3Dモデルが向こうから走ってきて一定の座標に来たら止まる、という動きをスクリプトを使い2つのアニメーションを切り替えることで制御してみます。
実行イメージ
シーンの準備
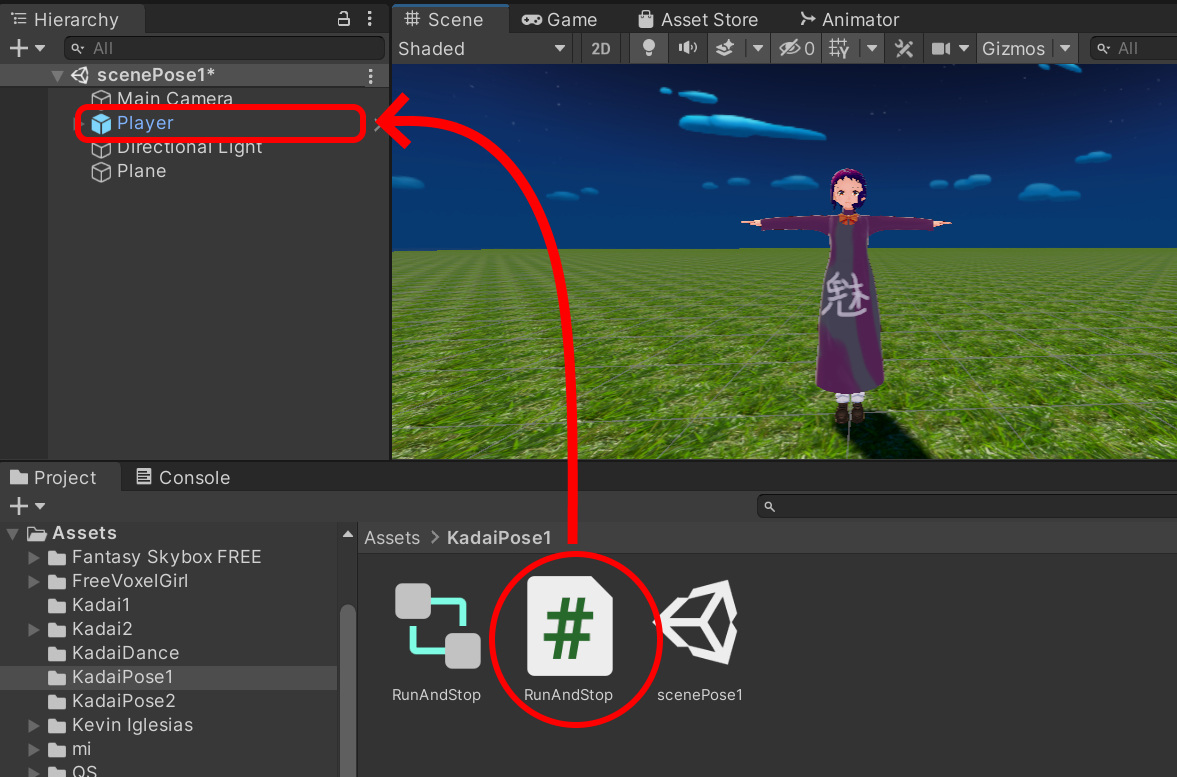
シーンの新規作成します。シーン名はscenePose1としました。
シーンにPlaneと3Dモデルを配置します。
シーンの軸はY軸に対してX軸を左にとっておきます。
3Dモデルは、名称をPlayerとしました。(3Dモデルはアセットストアで提供されているものでOKです)
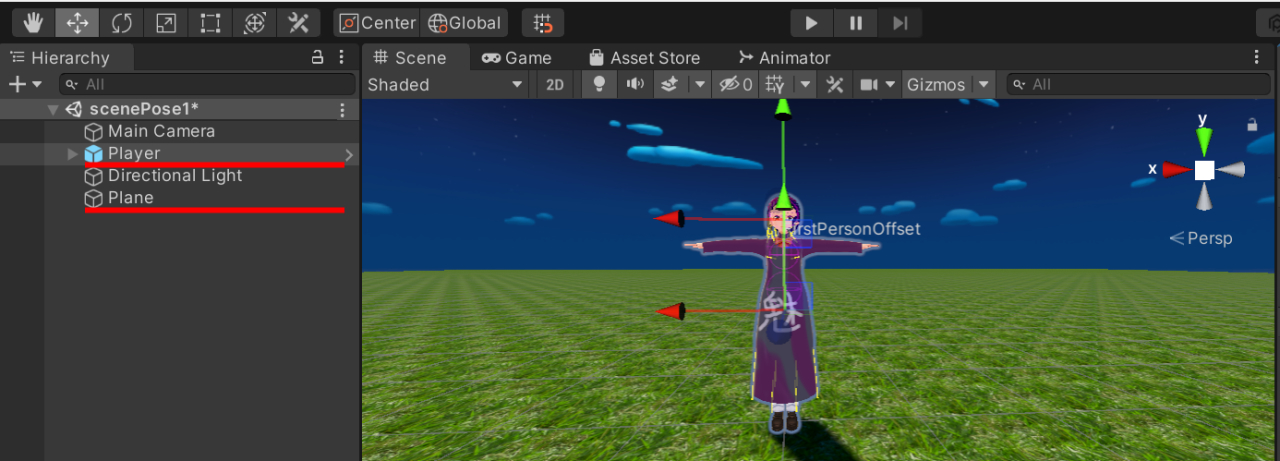
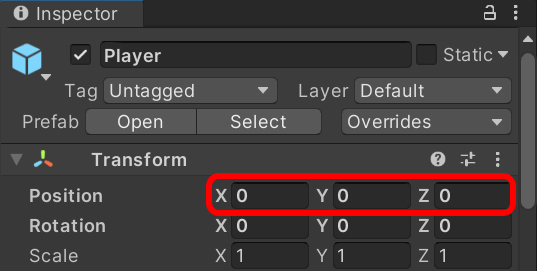
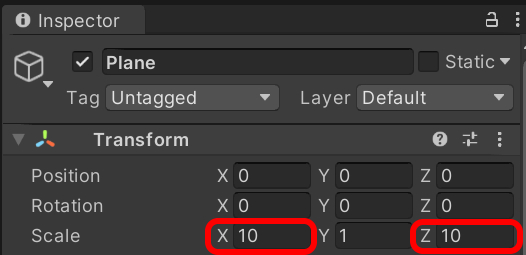
座標はPlane、Player(3Dモデル)ともにPosition X, Y, Z = 0, 0, 0とします。
デフォルトのPlane上でキャラを移動させるには少し小さいため、PlaneのScaleは、XとZをそれぞれ10にします。(10倍の大きさ)
空とPlaneのマテリアルは適当に設定してあります。
今回動画で使っている3DモデルはVroid Studioで作ったオリジナルなキャラをUnityに取り込んだモデルです。
取り込み方法は、以下を参照してください。

使っている空のアセットはFantasy Skybox FREEです。
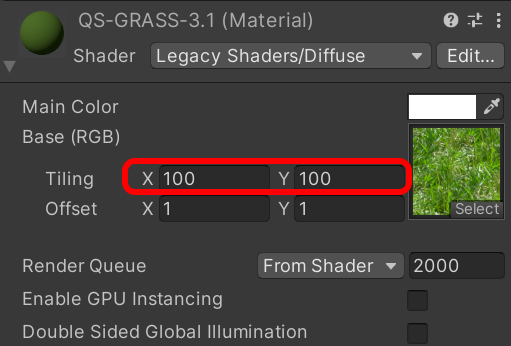
Planeのマテリアル素材はNature Materials vol.1を利用しました。ただこの素材をPlaneにドラッグ&ドロップして設定した状態では画像が荒いため、TilingのXとYを両方とも100にして細かくしています。
アニメーションの設定
今回3Dモデルのアニメーション素材は、Unity-Chan! Modelアセットを使います。
事前にプロジェクトにインポートしておいて下さい。
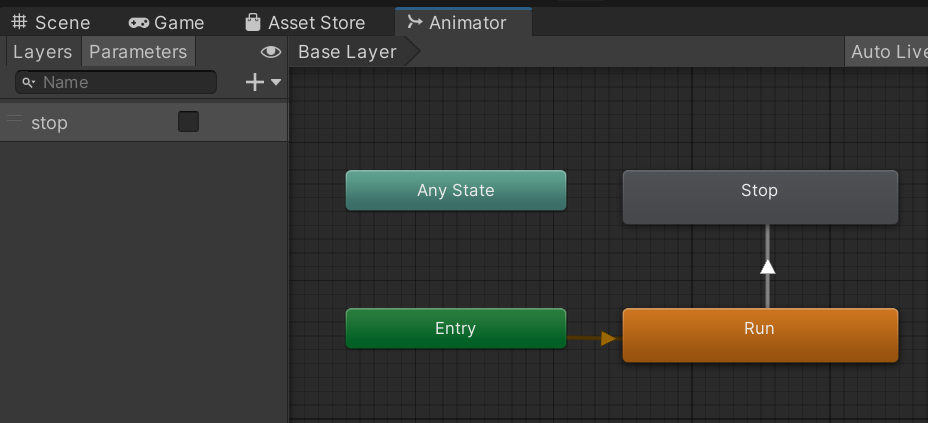
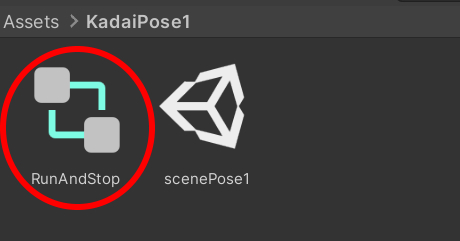
Animator Controllerを作成します。名前はRunAndStopとしておきます。
RunAndStopをダブルクリックして
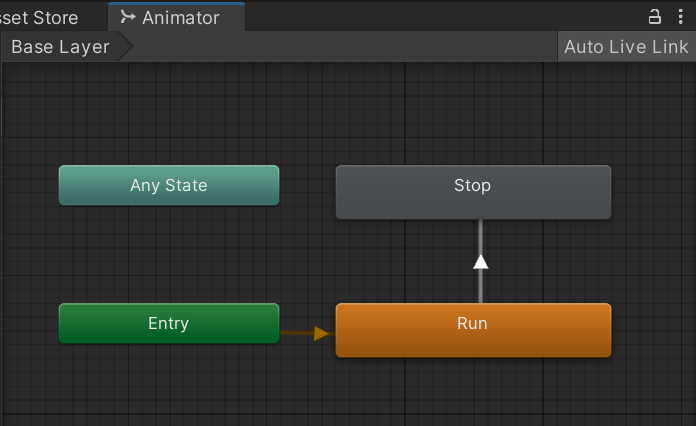
走る → 止まる
という遷移を以下のように作成します。
Animator Controllerの作成方法が分からない方は、以下を参考にしてください。

遷移はできましたが、遷移ごとの動きの設定(モーション設定)がまだ出来ていません。
次にRunとStopのモーション設定をしていきます。
Animator ControllerのRunを選択し、インスペクタウインドウに表示されたMotion項目の◎をクリックします。
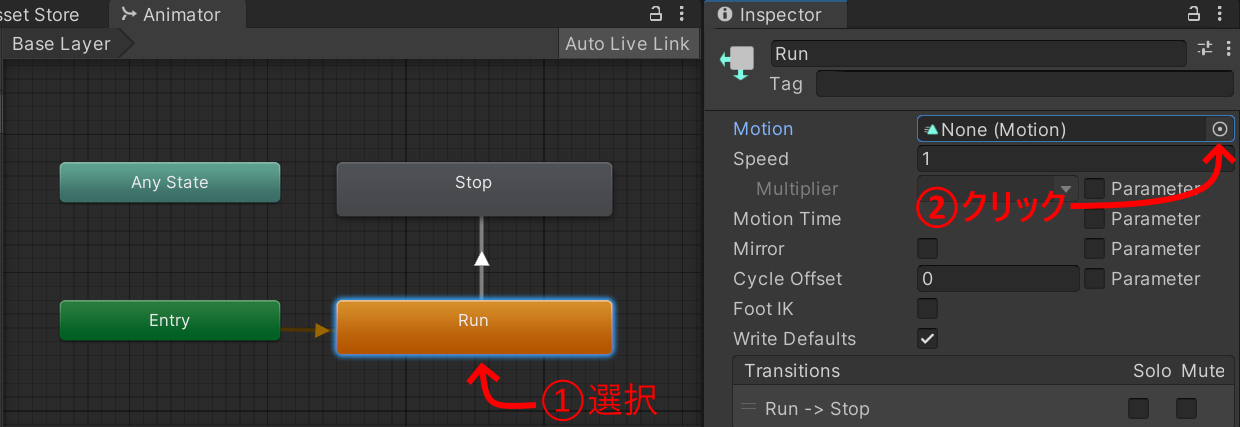
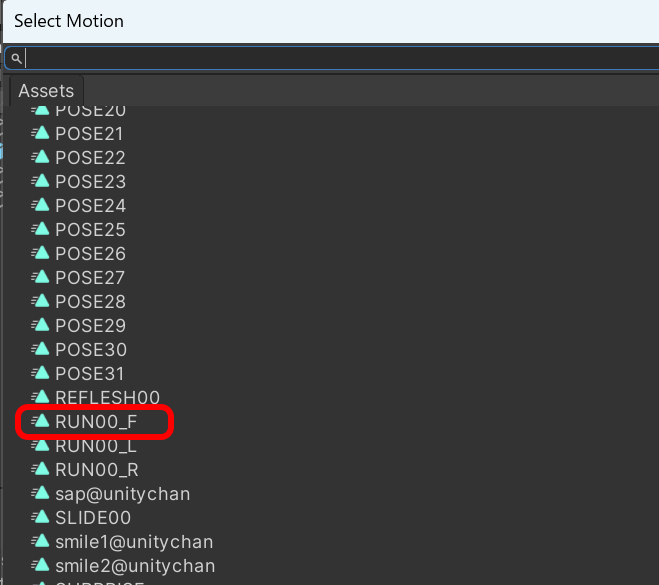
表示された中からRUN00_Fを選択します。
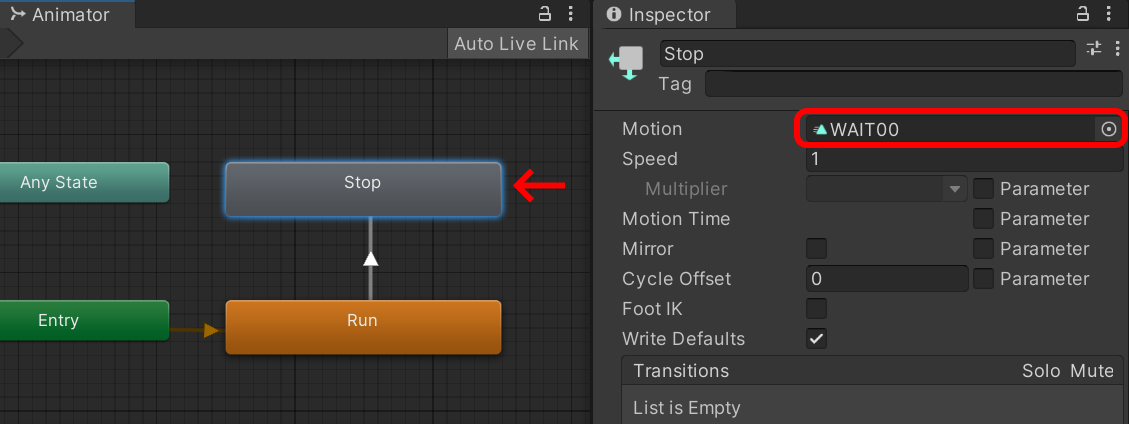
同じようにしてSTOPの方もMotion項目にWAIT00を設定します。
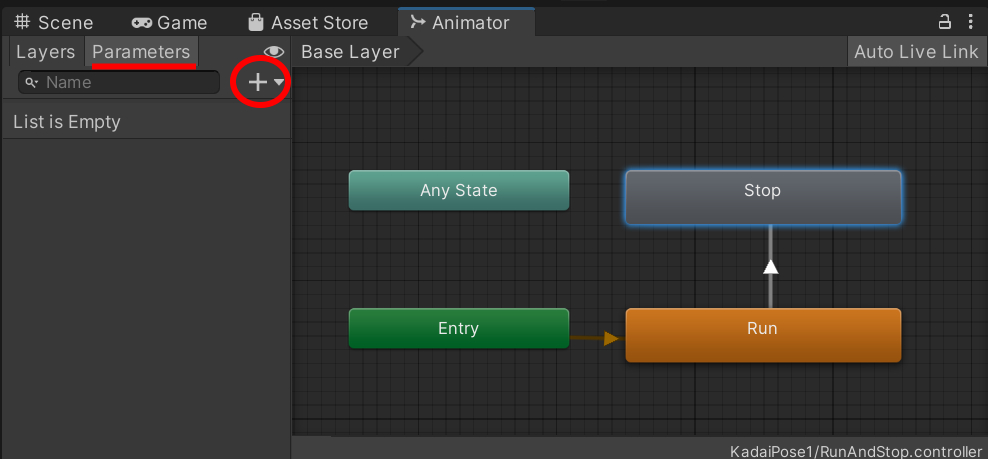
ここまでの状態では、RUN→STOPと一連の流れとなり、勝手に遷移してしまうためRUN→STOPへの遷移条件を設定します。(重要!)
遷移条件の設定
AnimatorウインドウのParametersタブを選択し、+をクリックします。
Boolを選択します。
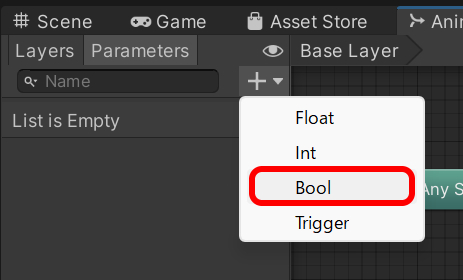
Boolは真偽値を判定するのに便利です。
true(真)とfalse(偽)の2つの値を持ちます。
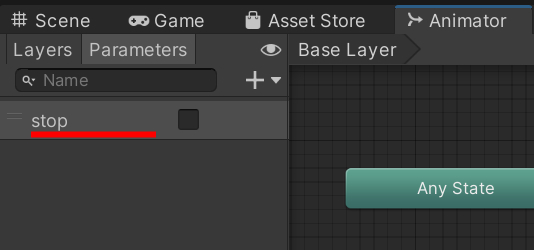
名称をstopと入力します。
RUN→STOPの遷移部分の矢印を選択します。
インスペクタウインドウに表示された項目の下の方にあるConditions項目の+をクリックします。
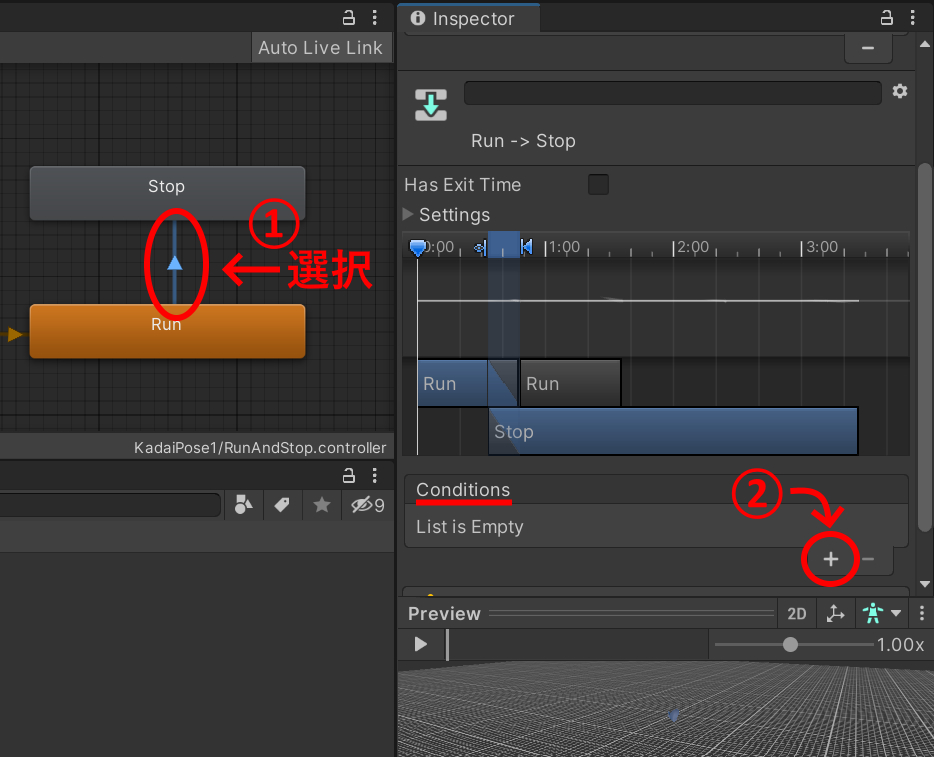
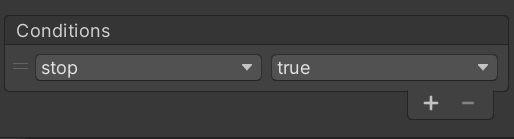
stop項目がtrueの状態にしておきます。
遷移条件の設定は以上です。
最後にこの遷移条件を含めた3Dモデルを走らせるスクリプトを作成します。
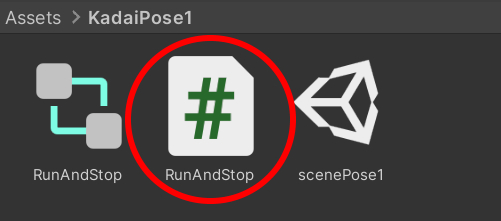
スクリプトの作成
C#スクリプトを作成します。
名称はRunAndStopとしました。
スクリプト全体を示します。
RunAndStop
using System.Collections;
using System.Collections.Generic;
using UnityEngine;

public class RunAndStop : MonoBehaviour
{
    public float speed;     // 移動速度
    private Animator animator;  // アニメーターコンポーネント取得用

    // Start is called before the first frame update
    void Start()
    {
        // アニメーターコンポーネント取得
        animator = GetComponent<Animator>();
    }

    // Update is called once per frame
    void Update()
    {
        // キャラの進行方向に移動する
		transform.position += speed * Time.deltaTime * transform.forward;
        // Z座標が20を越えたら停止
        if(transform.position.z > 20.0f){
            speed = 0;
            animator.SetBool("stop", true); // アニメーション切り替え
        }
    }
}
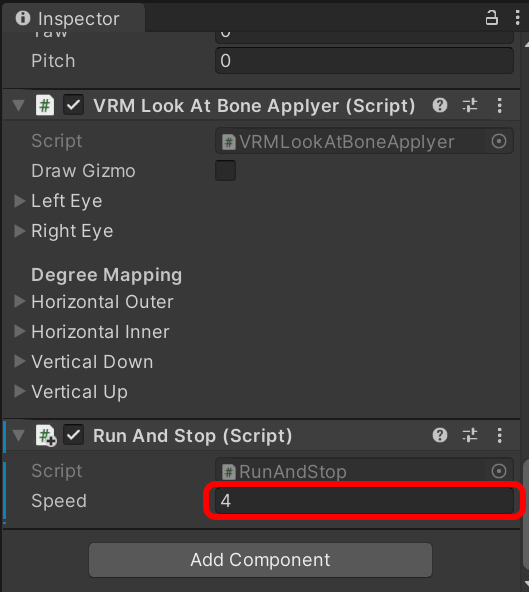
スクリプト作成後、Playerにアタッチします。
走る速度はインスペクタウインドウのSpeed項目で設定してください。
サンプル動画では、4にしました。
実行確認の前にプレイヤーをカメラから見て遠目にしておきます。
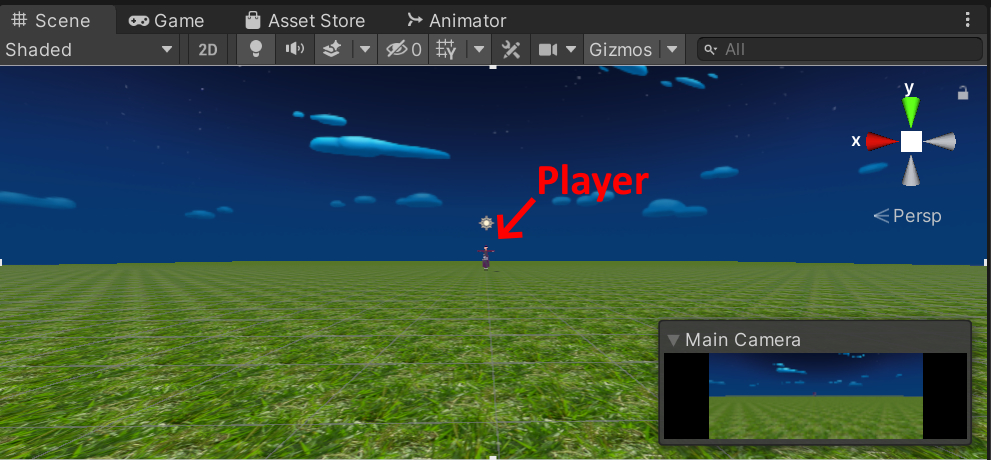
カメラ位置については、PlayerのTransform PositionのZ座標を20にして画面一杯にPlayerが収まるくらいが適当です。
ここまでの実行イメージです。
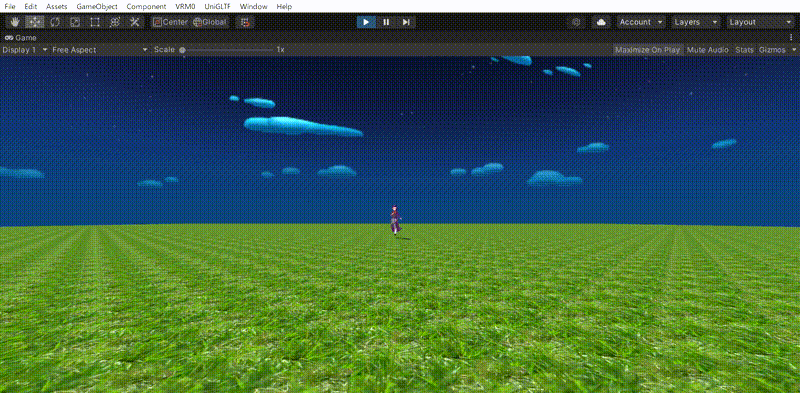
ちょっとした違和感に気づきますか?
キャラが走ってきて止まったとき、まだ少し走っているアニメ状態にあるのです。(味方によっては足踏みしているようにも見えます)
これは2つのアニメーションの切り替えに掛かる時間が関係しています。
AnimatorタブからRun→Stop項目の矢印を選択し、状態遷移に掛かる時間であるHas Exit Timeのチェックを外してみてください。
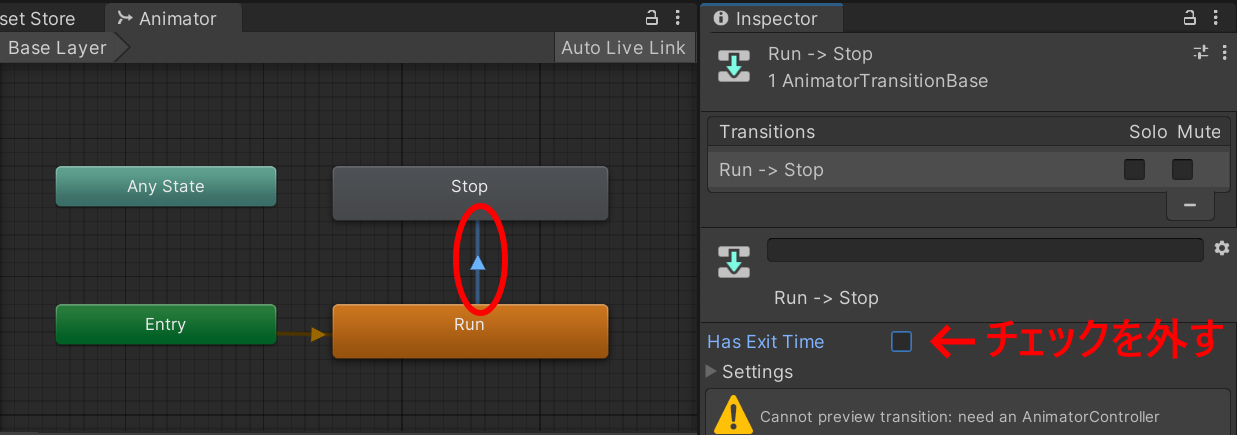
これで自然な形でアニメが切り替わるはずです。
最終イメージ
このスクリプトのポイントは、Updateメソッド内のif文です。
/ Z座標が20を越えたら停止
if(transform.position.z > 20.0f){
    speed = 0;
    animator.SetBool("stop", true); // アニメーション切り替え
}
speed=0; で3Dモデルの移動を停止させる同時に、遷移条件で設定したパラメタstop項目をtrueとしアニメーションをStopに遷移させています。
animator.SetBool("stop", true); // アニメーション切り替え
条件によるアニメーション遷移方法は、今回紹介した真偽値を持つBoolが一番分かりやすいかと思います。(Bool以外にも数値条件などによるFloatやIntなどもあります)
以上、Unity:スクリプトを使って条件によりアニメーションを切り替えるでした。
コメント